
Getting started with ELCARO Terminal
What the Terminal is, how to open it on any device, a tour of the screen and your first ten minutes, step by step.
ELCARO Terminal is a full-size chart workspace built around the ELCARO forecast. It puts ELCARO's own indicators on the candles of an asset, next to a complete set of standard chart tools: drawings, standard indicators, 18 chart types, several charts side by side, tabs, themes and alerts.
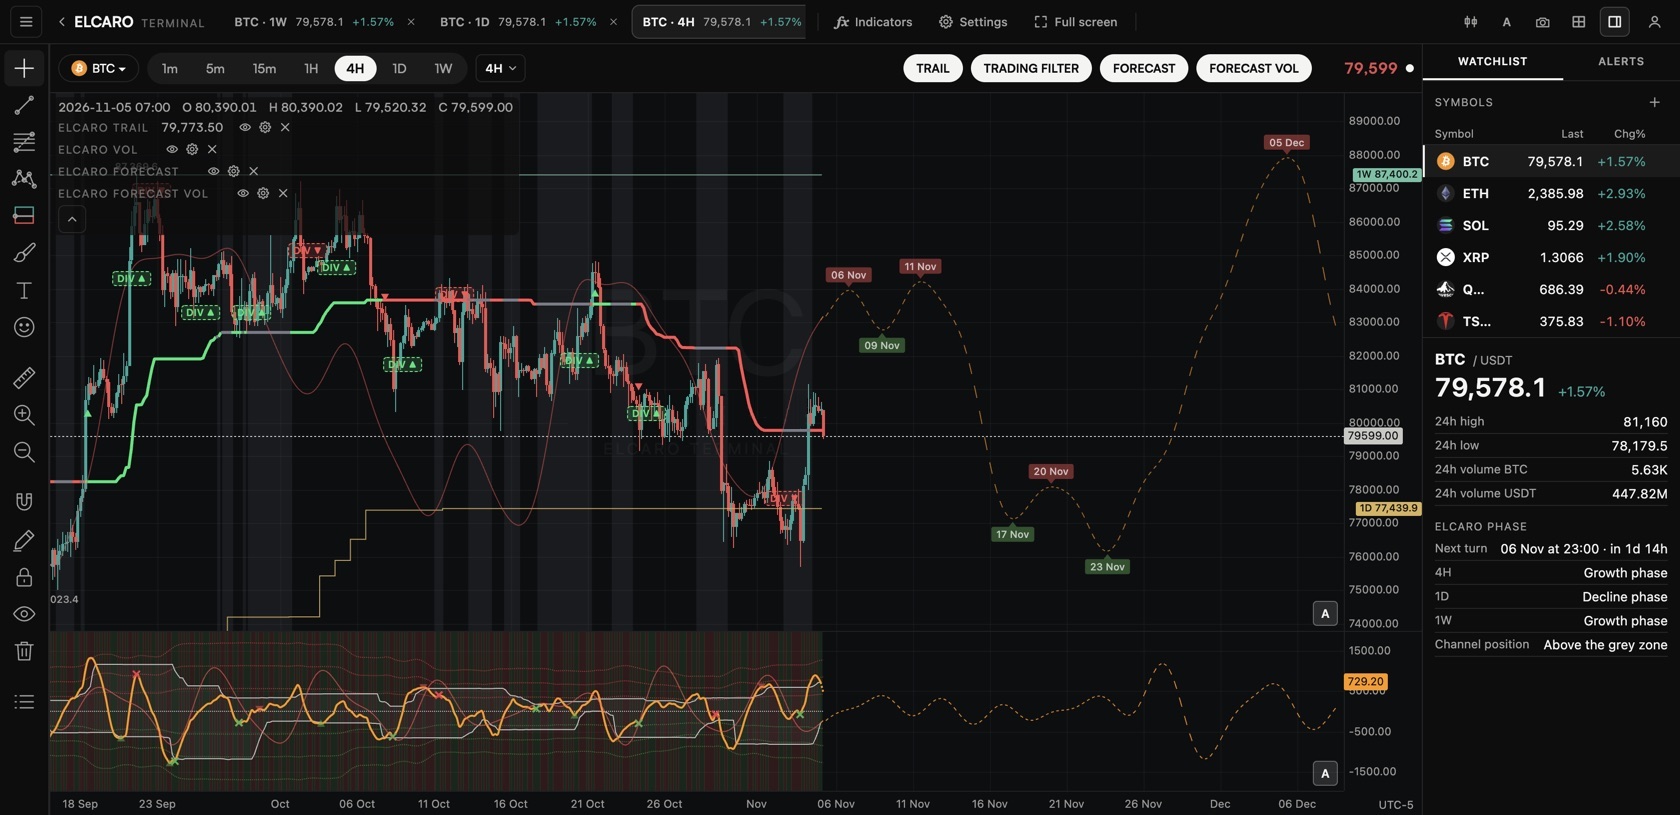
How to open it
- In a browser: go to
app.elcaro.app/terminaland sign in with your ELCARO account. - From the ELCARO web app: tap Terminal in the menu. The Terminal opens full screen. Back to app returns you.
- From Telegram: open @ELCARO_bot, start the Mini App and tap Terminal.
- In the ELCARO app on your phone: tap Terminal. It opens inside the app with your account already signed in.
Any signed-in account can open the Terminal. What you see in it depends on your plan; see Terminal plans and access.
A tour of the screen
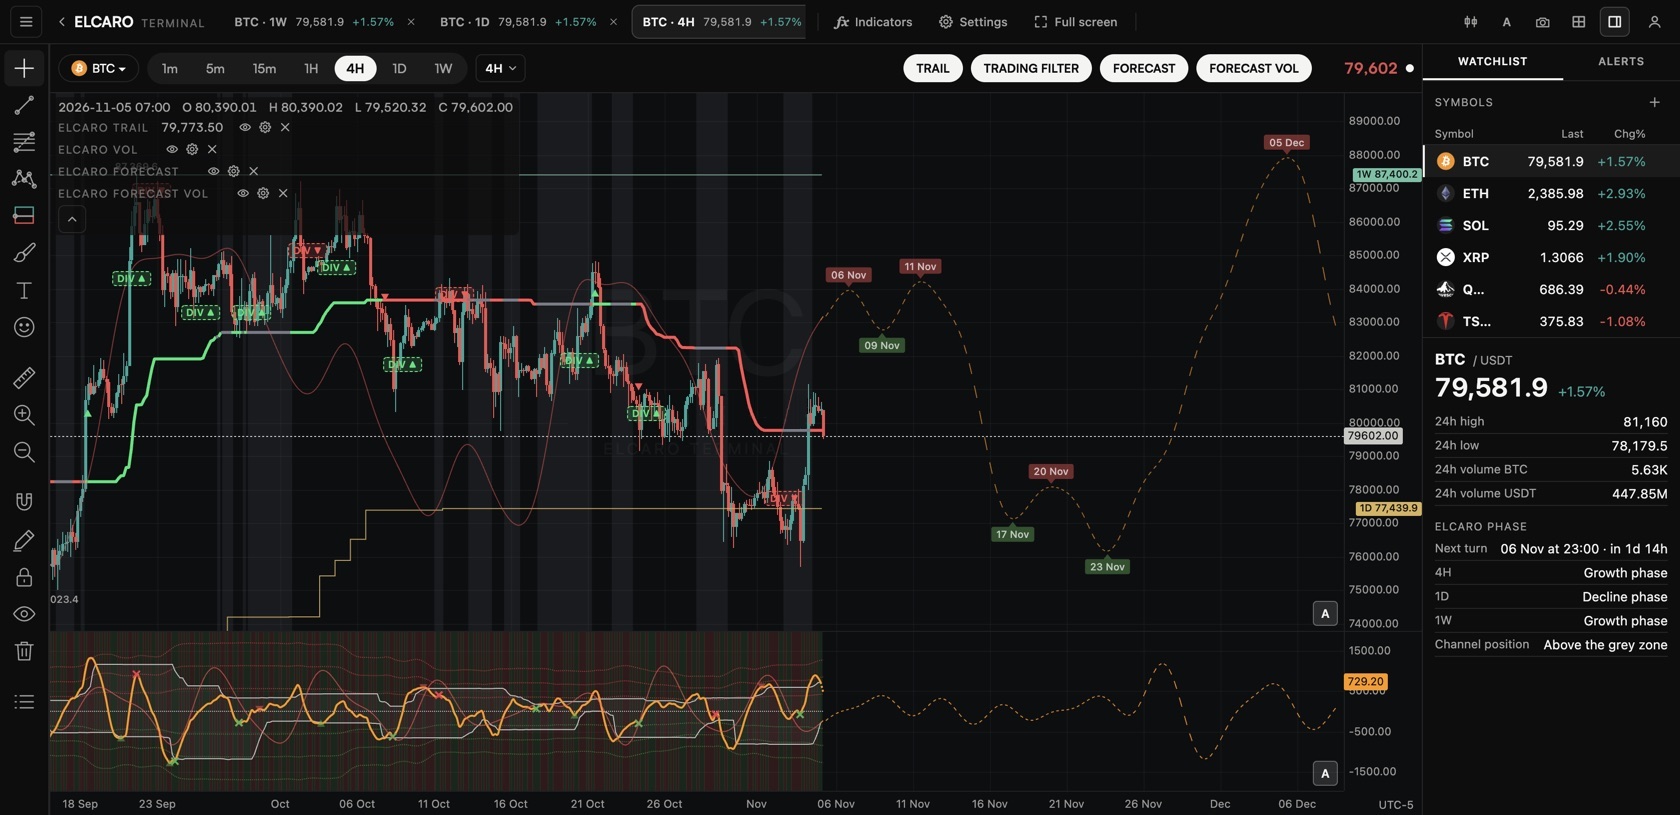
- Tabs along the very top. Each tab is its own workspace with its own charts. You can have up to 12.
- Header of the chart: the asset button (search), the timeframes, + for more timeframes, the chart type, Indicators (the fx button), Layout and sync, the camera (snapshot), Settings and full screen.
- Drawing toolbar on the left edge: lines, Fibonacci, shapes, text, measure and the rest.
- Chart area in the middle. Under the price chart sits the trading filter pane when it is switched on. Double-click any pane to expand it, and double-click again (or press
Esc) to go back. - Right panel: the WATCHLIST and ALERTS tabs. Panels you dock (options data, large trades) get their own tabs here too.
Your first ten minutes
- Step 1. Pick an asset. Click the asset name in the header, or press
Cmd+K(Mac) /Ctrl+K(Windows). Type a name or ticker and pick it from the list. - Step 2. Pick a timeframe. Click a timeframe in the header (1m, 5m, 15m, 1H, 4H, 1D, 1W). A small mark shows the timeframes your plan covers. On the 14-day free window, choose BTC and 4H.
- Step 3. Look at the ELCARO indicators. A new workspace has the Forecast, Forecast VOL, TRAIL and the trading filter switched on. If your plan covers this chart you see them right away. If not, the chart says so in one line.
- Step 4. Open Indicators. Click Indicators (fx). The ELCARO section is at the top. Every row has a switch and a Settings button.
- Step 5. Set your first alert. Right-click the chart at a price and choose Add alert at that price. Check the delivery switches and click Create.
- Step 6. Add a second chart. Click Layout and sync, pick 2 columns and set the second chart to a higher timeframe.
- Step 7. Make it yours. Click the chart type button to try one of 18 types, then open Settings → Canvas to pick a theme and an accent.
Saving
You never need to save. Tabs, layouts, indicators, drawings, the watchlist and your settings save to your account shortly after each change and follow you to every device where you sign in.
Phone and tablet
The Terminal works on a phone too. The header gets compact, the indicators sit in a dropdown, the right panel opens full screen and the drawing toolbar starts folded. A tablet keeps the right panel docked.
In the news: elcaro terminal is here · terminal help section live
Read next
Terminal plans and access
What every account gets, what the 14-day free window opens, what each app plan opens in the Terminal and what the ELCARO Terminal plan adds.
Using the Terminal without a plan
What you can do in the Terminal for free, the limit of 2 standard indicators, and a simple free setup step by step.
Switching indicators on and off
The Indicators window, the quick chips on the chart, the legend row with its eye, gear and remove buttons, and how settings work.
The app, the Terminal and the TradingView indicator
Three ways to use the same ELCARO algorithm: what each one is for and where you get it.